Lesson 1: Find your way around
What you should see
Open Blender. Your screen should look like the screenshot below: a gray cube, a light, and a camera. The big center area is the 3D Viewport. This is where you build. In the screenshot, the cube already has an orange outline, which means it is selected. That is why the Properties panel shows Cube.
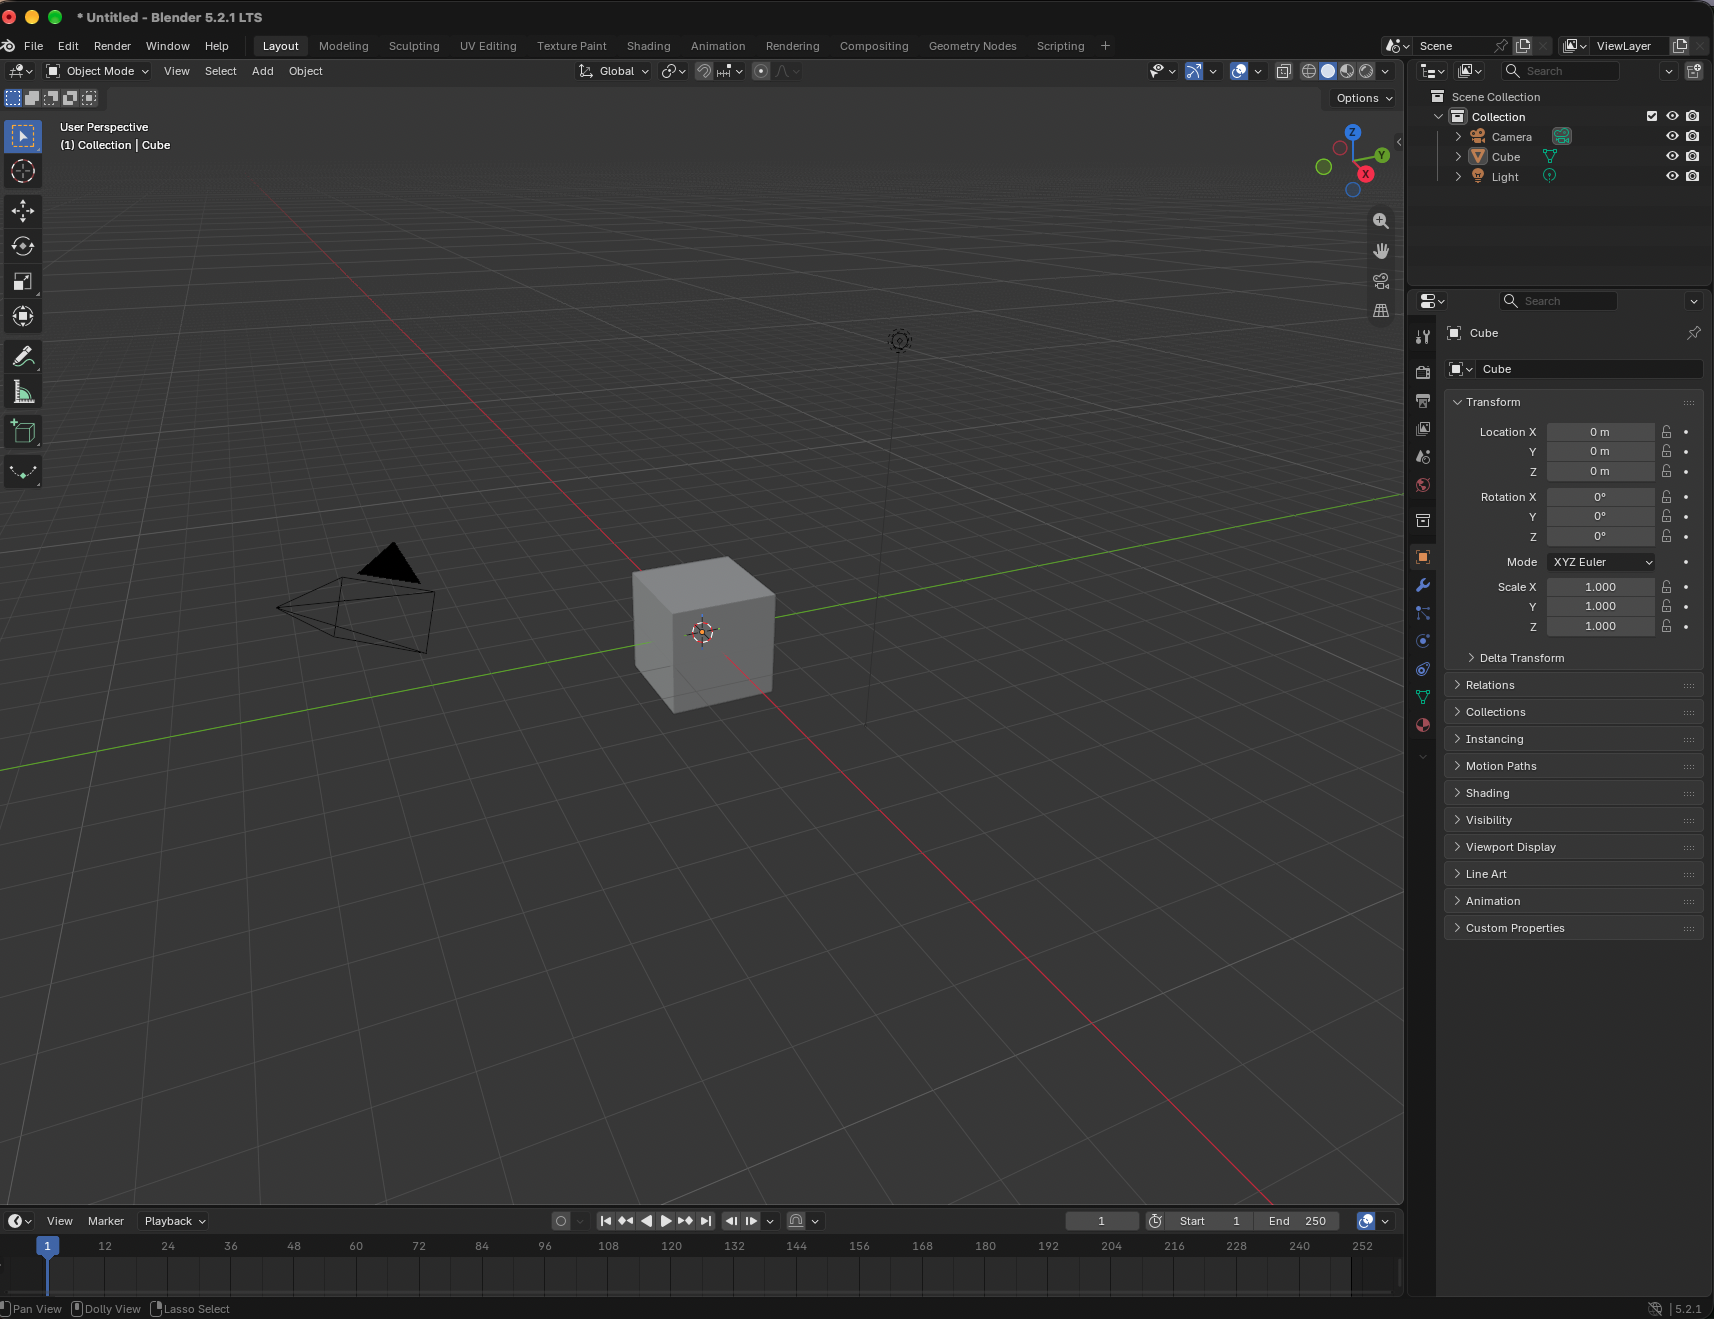
Parts of the screen:
1 Menu bar 2 Tool sidebar 3 3D Viewport (where you build) 4 Mode menu (reads Object Mode) 5 Outliner (everything in the scene) 6 Properties panel (settings for the selected object) 7 Timeline (ignore for now) 8 Status bar (mouse hints).
Steps
- Mouse Orbit the view. Hold Cmd and drag with the Magic Mouse. The cube should turn with the view. You are rotating the camera, not the cube.
- Mouse Zoom. Hold Cmd and swipe on the Magic Mouse surface. Swipe toward you to zoom in, away from you to zoom out. Confirmed on your Mac.
- Mouse Pan. Hold Shift + Cmd and drag. The view slides sideways. Confirmed on your Mac.
- Key Fixed views. Press 1 for front, 3 for side, 7 for top. If nothing changes, the Numpad setting is off. Go back to the Mac setup page.
- Tool Select the cube. Click the cube with the left mouse button. It gets an orange outline (it may already be selected, as in the screenshot). Click empty space to deselect.
- Key Save. Press Cmd + S. Name the file
lesson01.blendand save it in a folder you will remember.
Mac reminder: Blender uses Cmd where Windows uses Ctrl. Undo is Cmd + Z. Undo is your safety net, so use it freely.
Project: stacked "716" blocks
You will end with three cubes stacked near each other. Placement does not need to be neat yet.
- Tool Click the cube so it's selected.
- Key Press Shift + D. A copy appears and follows your mouse. Click once to place it. Press Esc instead if you want to cancel. (Blender's duplicate key is Shift + D. unverified on your Mac.)
- Key Repeat once more so you have three cubes.
- Check You see three cubes in the 3D Viewport.
- Key Save with Cmd + S.